SAAB 900 (classic): How to: CV Gaiter Replacement
Posted: Thu Apr 07, 2005 6:47 pm
This guide is based on the work I did on my 1990 C900 T16s.
After seeing that my left hand side CV boot was split, I made the decision to tackle the job of replacing the boot myself, and after much searching on the web I found several sites that gives excellent information, but none actually give info on what tools you'll need, and exact techniques on how they did the job, so here is my guide in easy speak to pulling a driveshaft, removing the CV joint, sticking on a new gaiter and refitting.
Tools I needed:
A Deep 32mm Socket
19mm Socket or Wheel Nut Remover
17mm Spanner
15mm Spanner
13mm Spanner or a 13mm Socket
17mm Socket
Circlip Pliers
Long Nose Pliers
Large Flat Head Screwdriver
Torque Wrench
A Hammer
Stanley Knife
Some Bits Of Wood About An Inch Or So Thick
Some String or Zip Ties
Extra Pair Of Hands
Axel Stand
Trolley Jack or Bottle Jack
CV Boot Kit containing new Gaiter, 2 clips and pack of grease
I also bought another tub of Molybdenum grease to repack the inner joint
A New Hub Nut
Instructions:
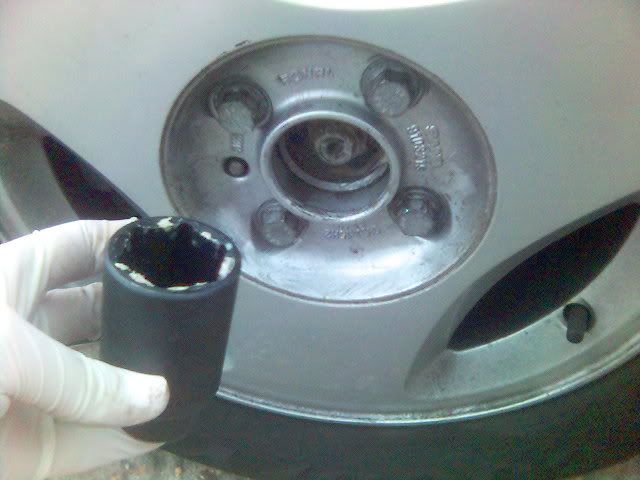
Prise off the centre plate of the wheel if you have one, and loosen (but do not remove) the wheel nuts with your 19mm socket or your wheel nut remover.
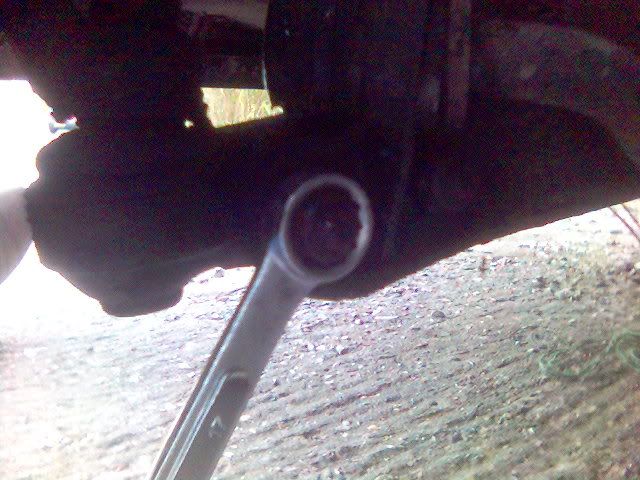
Get the 32mm socket and loosen (but do not remove) the centre hub nut.
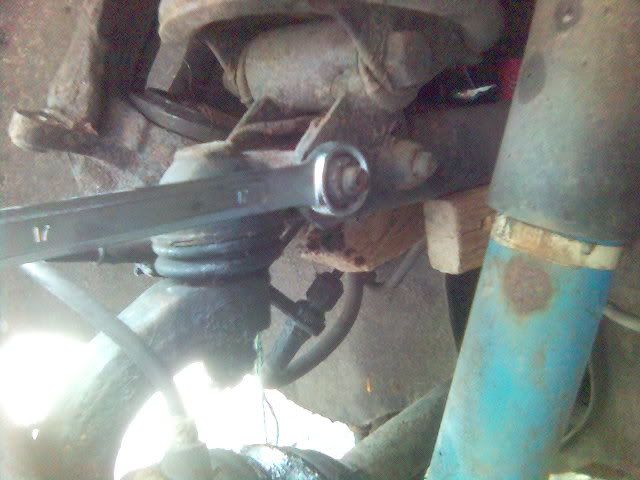
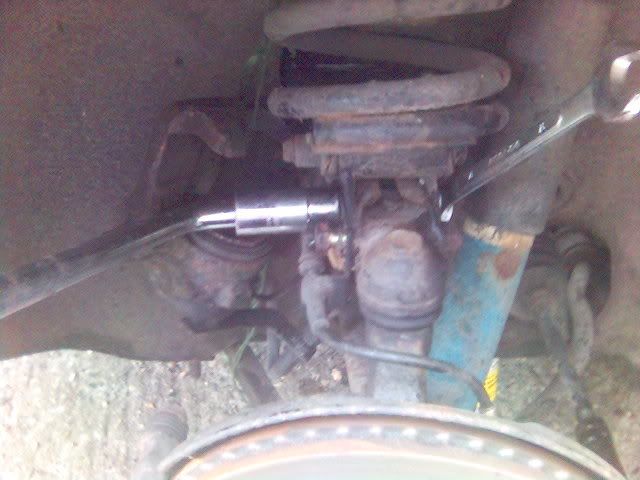
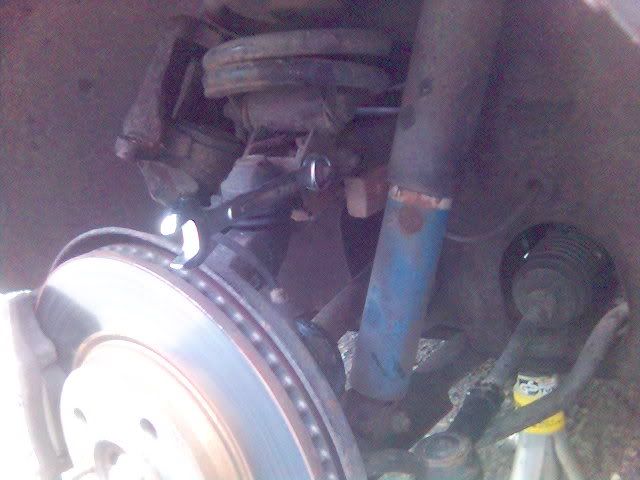
I found that chocking some bits of wood between the frame and the upper suspension arm stopped the suspension moving down when I jacked the car. You will need to do this to keep the pressure off the suspension arm and keep the driveshaft flat.
You can see the position of the wood in the picture below.
You then have to jack up the car and support it on an axel stand.
You can now undo the wheels nuts completely and remove the road wheel.
You are then going to have to remove the brake caliper and pads, but you can leave the brake line attached to the caliper, this will save you having to bleed the brakes later when you refit everything.
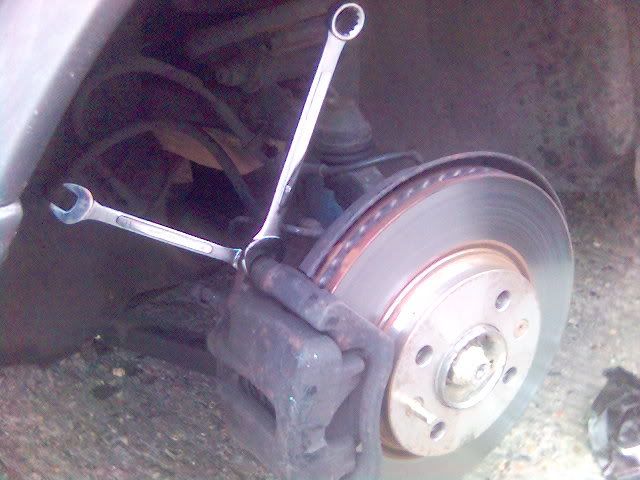
You are going to need the 15mm spanner, and either a 13mm socket or spanner for the caliper removal. The caliper is held on with 2 bolts with the 13mm head, but they lock into a 15mm head locking nut, which once you break the 13mm bolt free will just start to spin. So you need to slide the 15mm spanner onto it to hold it in place and stop it spinning as you undo the 13mm bolt. There is a bolt at the top on the back of the caliper and one of the bottom as well which you need to undo completely and remove.
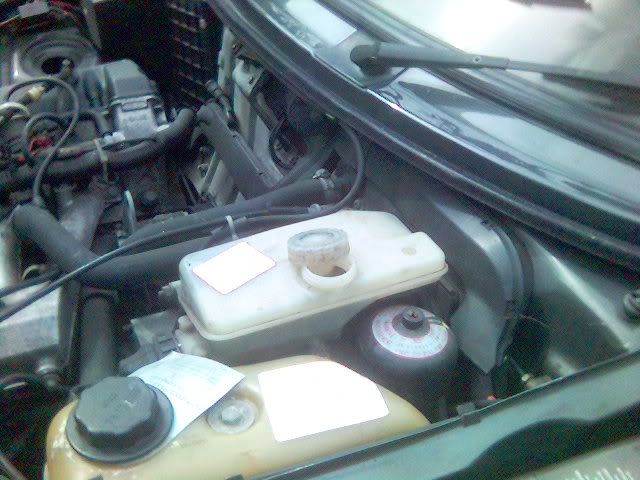
To ease the removal of the caliper, you will need to loosen off the cap of the brake fluid reservoir, just make sure you don't get anything into it.
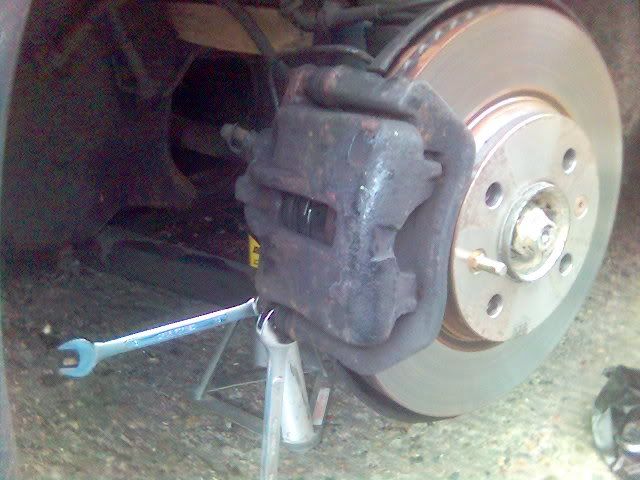
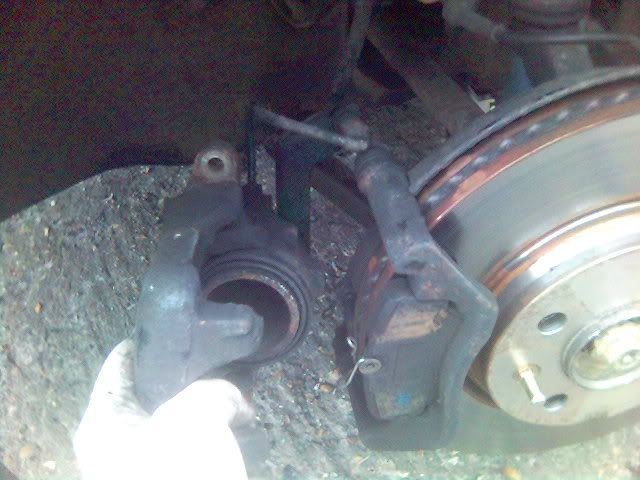
You should now be able to wriggle the caliper away from the pads and disc, and you will want to tie the caliper up out the way with either the string or the zip ties to stop any weight being placed on the brake lines.
You will need to remove the brake pads as well now, put them somewhere safe where you aren't going to get the surface of the pads dirty.
I now screwed the brake fluid cap back on to stop anything unwanted getting into the reservoir.
There are only 6 things that hold the hub onto the car in someway. These are 2 bolts on the top ball joint, 2 on the bottom ball joint, the nut on the track rod end (the end of the steering rack) and the main hub nut. Following my method you are not going to completely remove the hub, the reason I went this way, was I couldn't get the track rod end ball joint out for love nor money!! So it stayed there!
You can completely remove the hub nut now. I chose to fit a new one on refitting as you are going to torque it up quite tightly.
I found that the top 2 nuts and bolts came undone quite easily. You are going to need a 17mm socket and a 17mm spanner to get them undone. If you put one on each side it stops the bolt spinning once you break the nut free.
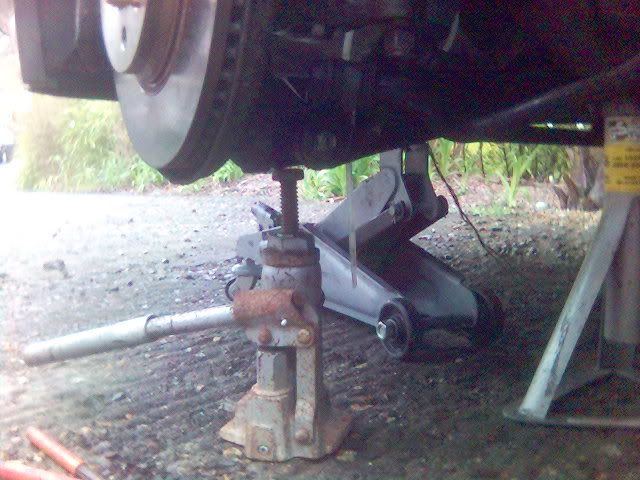
I found that the bottom two bolts were a lot harder to get undone and loose, but noticed that although you have the weight of the spring supported with the wood, the shock attaches to the bottom suspension arm, so I found by just very slightly supporting the weight of the arm on a bottle jack I was able to get the bolts free a lot easier.
Even with all 4 ball joint bolts removed, the hub will not fall out of place as it has a kind of bracket which sits in place where you removed the bolts from.
You can now remove the bottle jack from under the section where the bottom bolts were.
You will now want to get right under the car and remove the jubilee clip from the gaiter on the inner side of the drive shaft. This is the end of the drive shaft closest to the gear box. This is so when you withdraw the driveshaft it will pull away freely.
You are now pretty much set to pull the drive shaft out. But you are going to need another pair of hands for this next bit. As the only bit still connecting the hub to the car is the track rod end ball joint, you will want one person to pull the hub back away from the driveshaft and try and pivot it around the track rod end. While one person is doing this, the other person can pull the driveshaft out. You will want to pull the driveshaft out as straight as possible so as not to damage the inner tripod bearing end of the shaft. The first person can then swing the hub back round and put the top and bottom ball joint brackets back into their original mounting points.
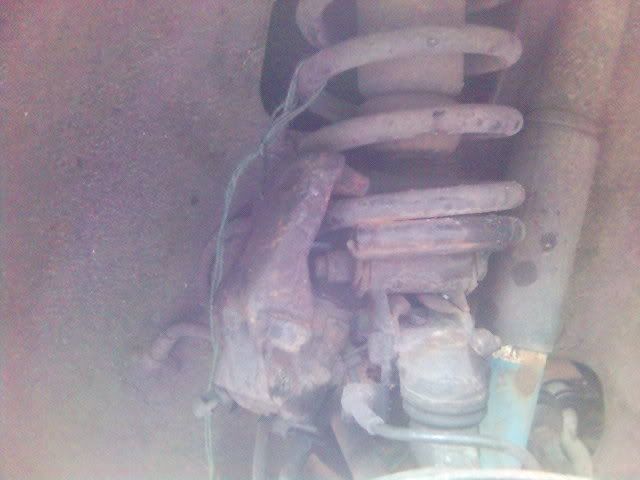
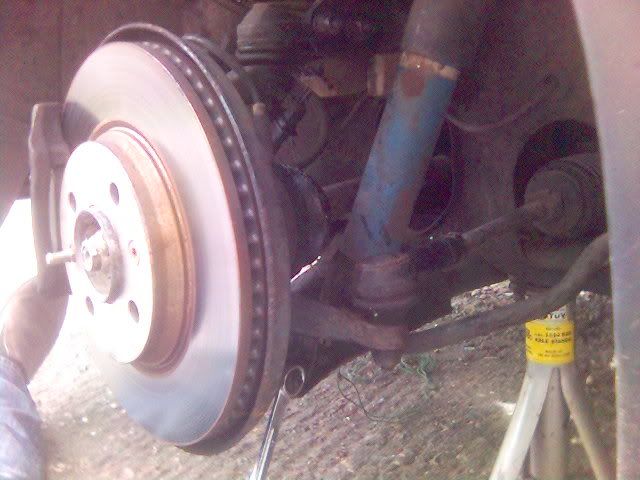
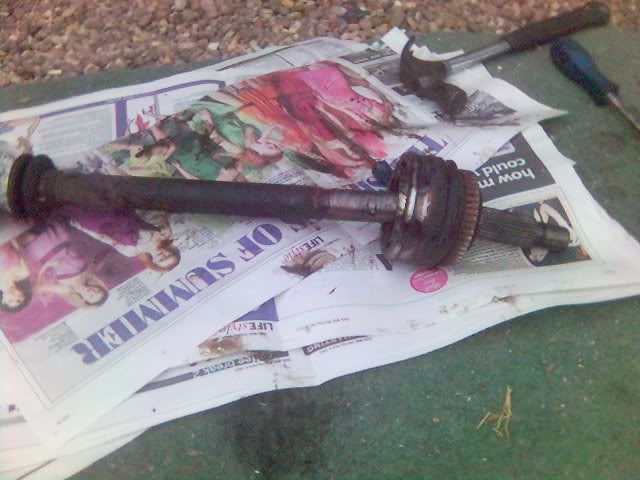
With the driveshaft out, and the hub nicely sitting back in it's mountings, it should look like this.

As it was the CV joint end that had split, this next part only covers the job of removing the CV joint and not the tripod bearing on the other end of the shaft.
I covered up the tripod bearing end with a rubber glove to stop any grit getting into it, you also want to be very careful to not damage it either.
My gaiter was completely split, so I just cut away the old gaiter with a Stanley knife.
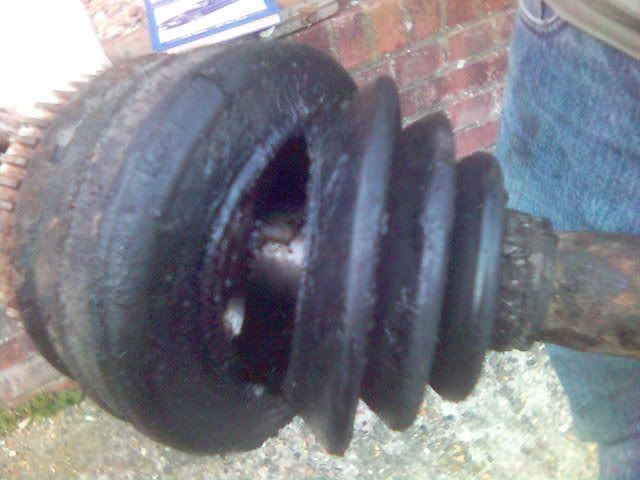
You then want to clean away as much of the old grease as possible as you are going to need to get access to a circlip which is pretty well hidden.
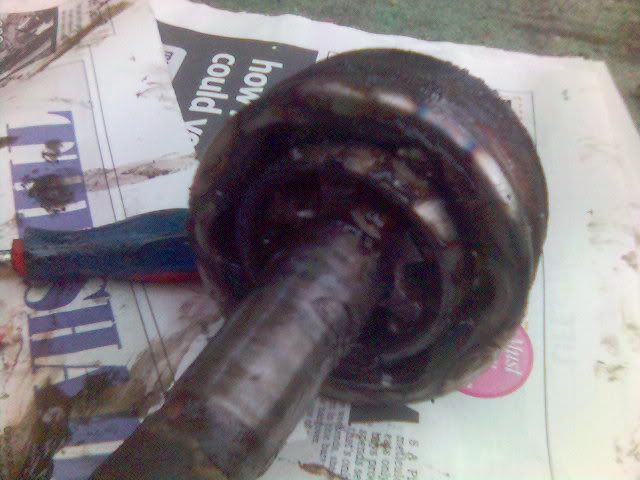
You can see here where the circlip is when the driveshaft has been removed.
Using the circlip pliers and an extra pair of hands you want to prise open the circlip and have someone pull the CV joint off the shaft. (Easier said than done, it took me about 20 mins)
Once you have removed the CV joint, you can slide a new clip onto the shaft, and then slide your new gaiter on. Secure the clip nice and tight, you should also get a new circlip in your CV boot pack, so I fitted this on to the CV joint.
You then want to get the pack of grease you got, and squeeze it into the CV joint, working it into the bearings as you go. The CV joint will now slide onto the driveshaft and the circlip will automatically clip it into place. You can then attach the larger clip holding your new boot firmly in place.
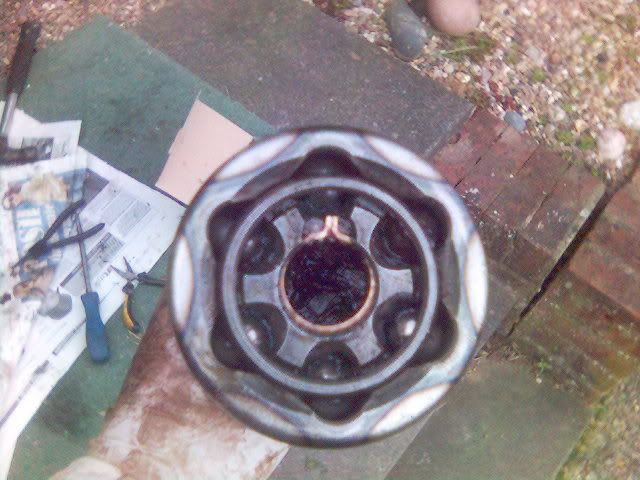
I then cleaned out the inner drive cup from the gearbox and found it to be completely empty of grease. My tripod bearing looked like this when I withdrew it from the gearbox.
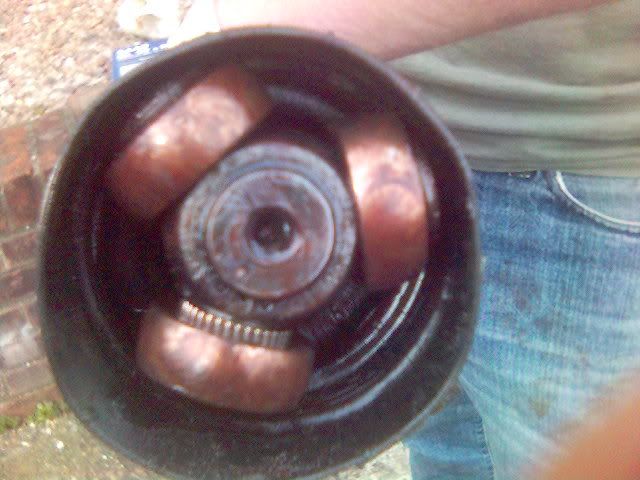
So before refitting of the shaft, I packed out the tripod bearing with grease, and put some in the inner drive cup as well.
You are now ready to reassemble.
So get your helper to pull the hub back out the same way you did for removing the shaft, and slide the shaft back in being careful not to damage the tripod bearing on the way in. You should then be able to swing your hub back round and onto the splines of the driveshaft.
And in true Haynes manual style fashion, reassembly is simply the reverse of removal. I would make sure that you use a Haynes manual for the correct torque settings for the hub nut and the various other bolts, as the last thing you need is for something to come undone!
Once you have everything back together and the wheel on, don't forget to take out your blocks of wood you used to chock up the suspension arm!
You should be all set now to go for a spin!
After seeing that my left hand side CV boot was split, I made the decision to tackle the job of replacing the boot myself, and after much searching on the web I found several sites that gives excellent information, but none actually give info on what tools you'll need, and exact techniques on how they did the job, so here is my guide in easy speak to pulling a driveshaft, removing the CV joint, sticking on a new gaiter and refitting.
Tools I needed:
A Deep 32mm Socket
19mm Socket or Wheel Nut Remover
17mm Spanner
15mm Spanner
13mm Spanner or a 13mm Socket
17mm Socket
Circlip Pliers
Long Nose Pliers
Large Flat Head Screwdriver
Torque Wrench
A Hammer
Stanley Knife
Some Bits Of Wood About An Inch Or So Thick
Some String or Zip Ties
Extra Pair Of Hands
Axel Stand
Trolley Jack or Bottle Jack
CV Boot Kit containing new Gaiter, 2 clips and pack of grease
I also bought another tub of Molybdenum grease to repack the inner joint
A New Hub Nut
Instructions:
Prise off the centre plate of the wheel if you have one, and loosen (but do not remove) the wheel nuts with your 19mm socket or your wheel nut remover.
Get the 32mm socket and loosen (but do not remove) the centre hub nut.
I found that chocking some bits of wood between the frame and the upper suspension arm stopped the suspension moving down when I jacked the car. You will need to do this to keep the pressure off the suspension arm and keep the driveshaft flat.
You can see the position of the wood in the picture below.
You then have to jack up the car and support it on an axel stand.
You can now undo the wheels nuts completely and remove the road wheel.
You are then going to have to remove the brake caliper and pads, but you can leave the brake line attached to the caliper, this will save you having to bleed the brakes later when you refit everything.
You are going to need the 15mm spanner, and either a 13mm socket or spanner for the caliper removal. The caliper is held on with 2 bolts with the 13mm head, but they lock into a 15mm head locking nut, which once you break the 13mm bolt free will just start to spin. So you need to slide the 15mm spanner onto it to hold it in place and stop it spinning as you undo the 13mm bolt. There is a bolt at the top on the back of the caliper and one of the bottom as well which you need to undo completely and remove.
To ease the removal of the caliper, you will need to loosen off the cap of the brake fluid reservoir, just make sure you don't get anything into it.
You should now be able to wriggle the caliper away from the pads and disc, and you will want to tie the caliper up out the way with either the string or the zip ties to stop any weight being placed on the brake lines.
You will need to remove the brake pads as well now, put them somewhere safe where you aren't going to get the surface of the pads dirty.
I now screwed the brake fluid cap back on to stop anything unwanted getting into the reservoir.
There are only 6 things that hold the hub onto the car in someway. These are 2 bolts on the top ball joint, 2 on the bottom ball joint, the nut on the track rod end (the end of the steering rack) and the main hub nut. Following my method you are not going to completely remove the hub, the reason I went this way, was I couldn't get the track rod end ball joint out for love nor money!! So it stayed there!
You can completely remove the hub nut now. I chose to fit a new one on refitting as you are going to torque it up quite tightly.
I found that the top 2 nuts and bolts came undone quite easily. You are going to need a 17mm socket and a 17mm spanner to get them undone. If you put one on each side it stops the bolt spinning once you break the nut free.
I found that the bottom two bolts were a lot harder to get undone and loose, but noticed that although you have the weight of the spring supported with the wood, the shock attaches to the bottom suspension arm, so I found by just very slightly supporting the weight of the arm on a bottle jack I was able to get the bolts free a lot easier.
Even with all 4 ball joint bolts removed, the hub will not fall out of place as it has a kind of bracket which sits in place where you removed the bolts from.
You can now remove the bottle jack from under the section where the bottom bolts were.
You will now want to get right under the car and remove the jubilee clip from the gaiter on the inner side of the drive shaft. This is the end of the drive shaft closest to the gear box. This is so when you withdraw the driveshaft it will pull away freely.
You are now pretty much set to pull the drive shaft out. But you are going to need another pair of hands for this next bit. As the only bit still connecting the hub to the car is the track rod end ball joint, you will want one person to pull the hub back away from the driveshaft and try and pivot it around the track rod end. While one person is doing this, the other person can pull the driveshaft out. You will want to pull the driveshaft out as straight as possible so as not to damage the inner tripod bearing end of the shaft. The first person can then swing the hub back round and put the top and bottom ball joint brackets back into their original mounting points.
With the driveshaft out, and the hub nicely sitting back in it's mountings, it should look like this.
As it was the CV joint end that had split, this next part only covers the job of removing the CV joint and not the tripod bearing on the other end of the shaft.
I covered up the tripod bearing end with a rubber glove to stop any grit getting into it, you also want to be very careful to not damage it either.
My gaiter was completely split, so I just cut away the old gaiter with a Stanley knife.
You then want to clean away as much of the old grease as possible as you are going to need to get access to a circlip which is pretty well hidden.
You can see here where the circlip is when the driveshaft has been removed.
Using the circlip pliers and an extra pair of hands you want to prise open the circlip and have someone pull the CV joint off the shaft. (Easier said than done, it took me about 20 mins)
Once you have removed the CV joint, you can slide a new clip onto the shaft, and then slide your new gaiter on. Secure the clip nice and tight, you should also get a new circlip in your CV boot pack, so I fitted this on to the CV joint.
You then want to get the pack of grease you got, and squeeze it into the CV joint, working it into the bearings as you go. The CV joint will now slide onto the driveshaft and the circlip will automatically clip it into place. You can then attach the larger clip holding your new boot firmly in place.
I then cleaned out the inner drive cup from the gearbox and found it to be completely empty of grease. My tripod bearing looked like this when I withdrew it from the gearbox.
So before refitting of the shaft, I packed out the tripod bearing with grease, and put some in the inner drive cup as well.
You are now ready to reassemble.
So get your helper to pull the hub back out the same way you did for removing the shaft, and slide the shaft back in being careful not to damage the tripod bearing on the way in. You should then be able to swing your hub back round and onto the splines of the driveshaft.
And in true Haynes manual style fashion, reassembly is simply the reverse of removal. I would make sure that you use a Haynes manual for the correct torque settings for the hub nut and the various other bolts, as the last thing you need is for something to come undone!
Once you have everything back together and the wheel on, don't forget to take out your blocks of wood you used to chock up the suspension arm!
You should be all set now to go for a spin!