Saab 9-5 Jamsaab Quickshift fitting
Posted: Mon Jul 15, 2013 10:57 pm
I fitted a Jamsaab Quickshift to my MY04 9-5 at the weekend, I took some snaps which may prove useful if you're thinking about the same thing.
Full centre console removed as per this thread from Robert.
Lift the leather gaiter up
Remove the compartment or ashtray with holder using a screwdriver and 82 93 474 Removal tool.
Remove the gear lever cover, 2 screws.
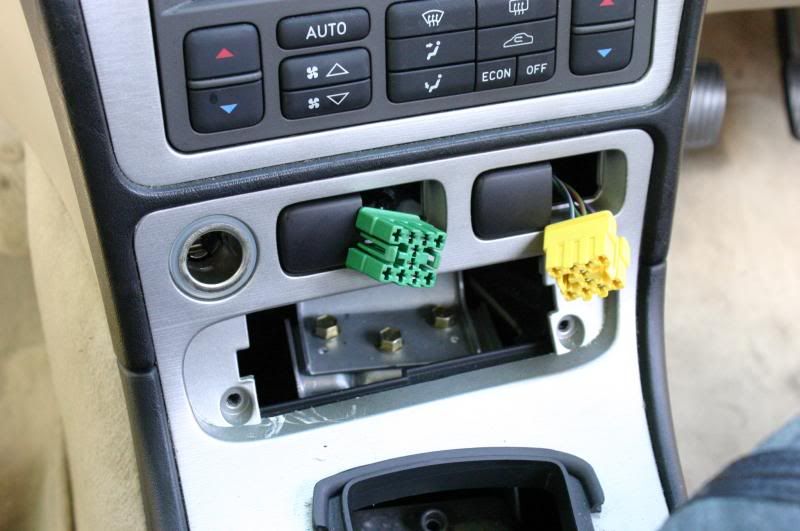
Unplug the connector for the central locking system switch.
Lift up the gear lever gaiter and undo the connectors for the seat heating, seat ventilation and cigarette lighter switches.
Important
Mark the connectors to avoid incorrect reconnection - this was easy enough to remember as I only have 2 plugs!
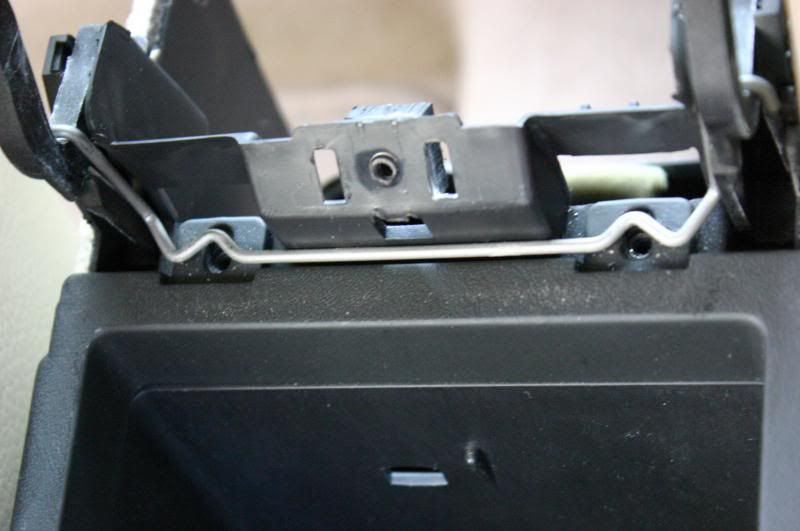
Remove the rear section of the centre console by removing the screw on the top. Then lift straight up and unplug the connector (note the armrest stop & where it sits).
Select reverse and remove the key.
Rotate and lift up the theft protection antenna unit (bayonet fitting) from the ignition switch and unplug the connector.
Insert the key and select neutral.
Disconnect the switch for the electric window lifts and unplug the connectors. Remove the coin holder.
Remove the screws holding the upper part of the centre console, 6 screws.
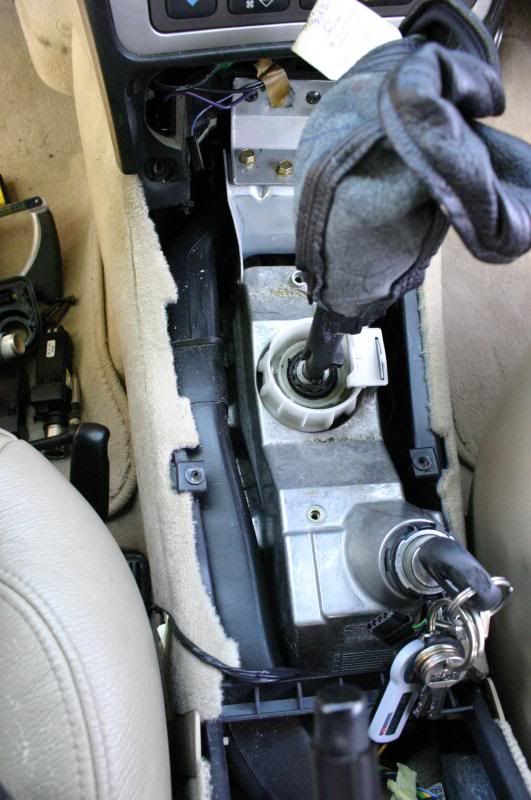
Lift out the upper part of the centre console, leaving it looking like this:
Fold back the carpets to the side of the centre console; this will involve pulling them out of the lower part of the dash slightly, but they slot back in easily enough afterwards.
Remove the front torx screws, 2 pcs.
Remove the rear screws, 2 pcs.
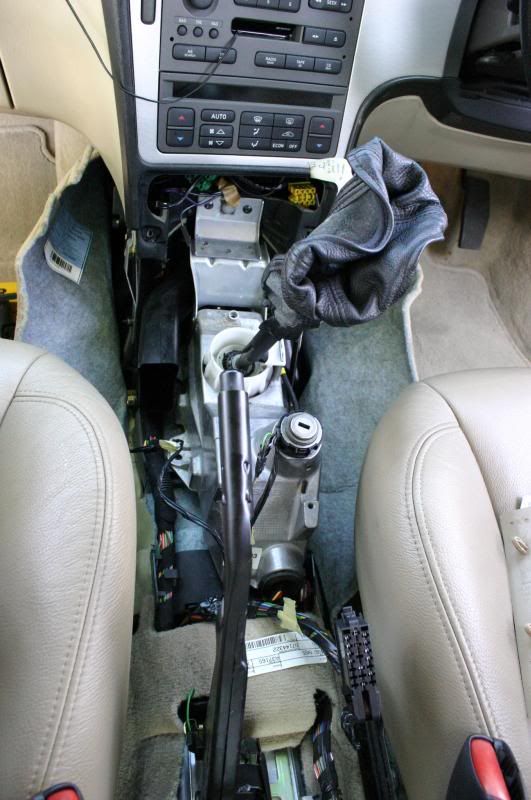
Lift and remove the centre console, making sure the rear air vent duct comes out too.
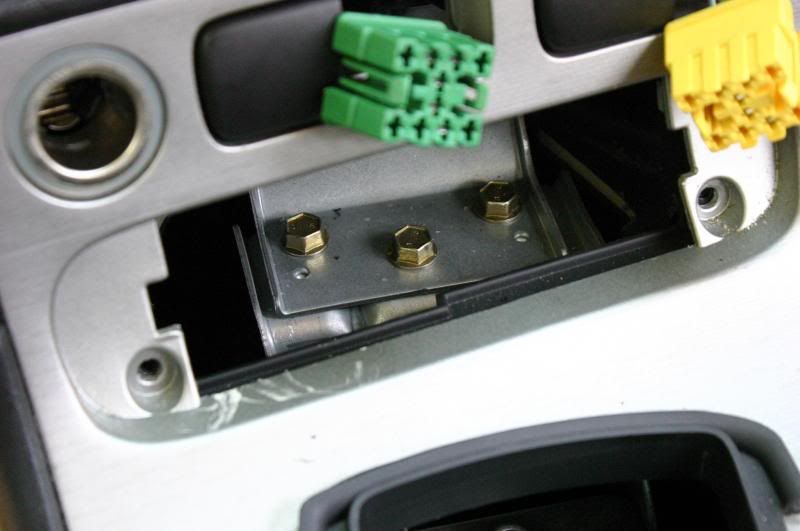
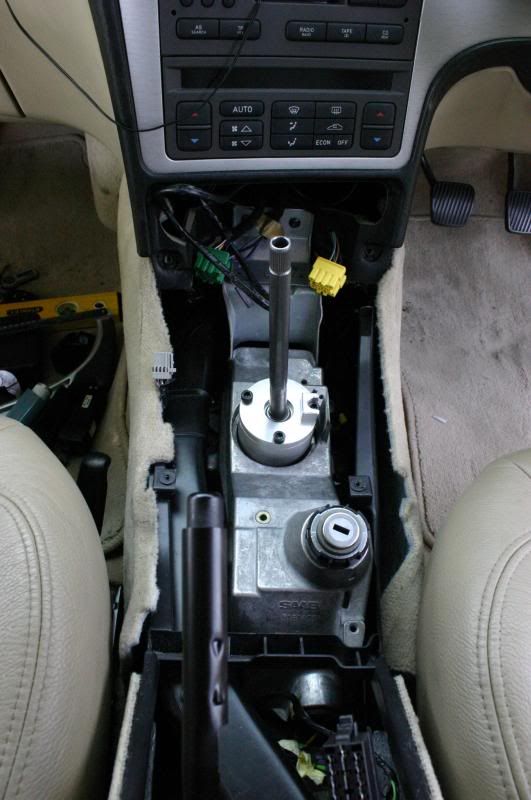
Which will leave you looking at this:
Remove the 3 10mm bolts at the front of the selector unit:
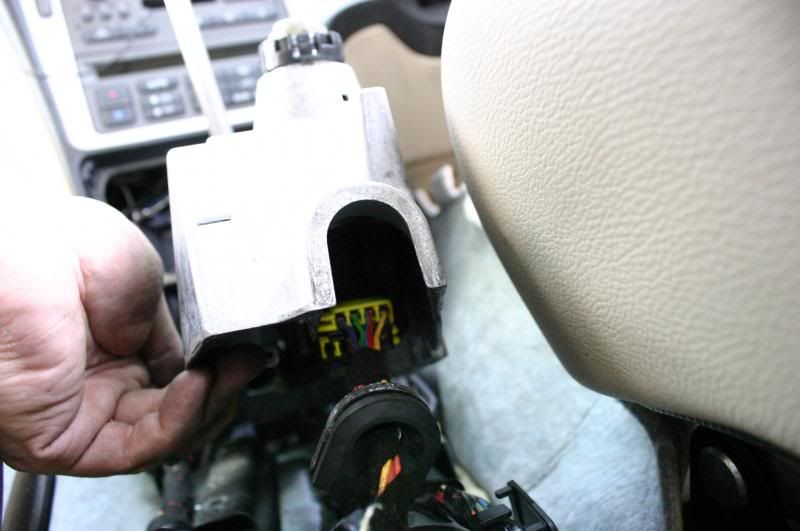
Undo the 4 Torx bolts at the base, which will allow you lift the rear of the aluminium casing up slightly. You can then unplug the elecrics from the ignition:
Now the very tricky job of removing the 13mm bolt securing the selector arm to the gearstick. This is tricky as you only get so much movement from the unit until you undo that bolt! I used a cut-down 13mm spanner, but the bolt came out by hand once loosened initially.
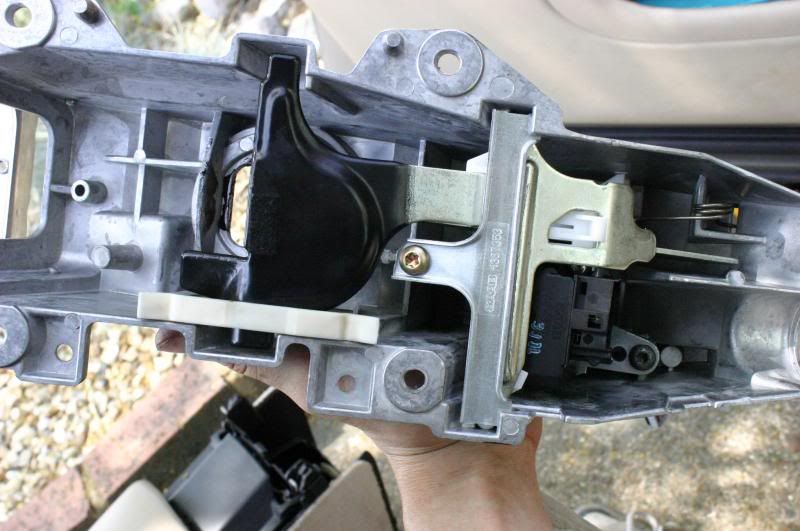
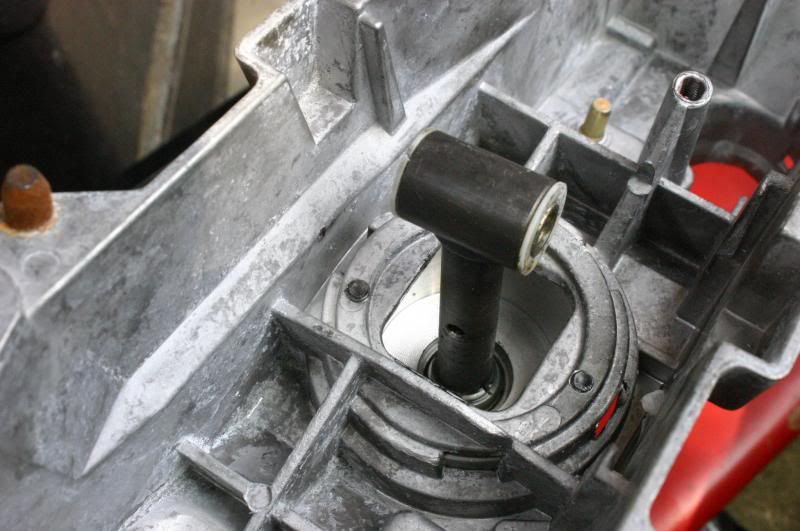
When you get the bolt out, the selector unit will just lift out - looking like this (underside):
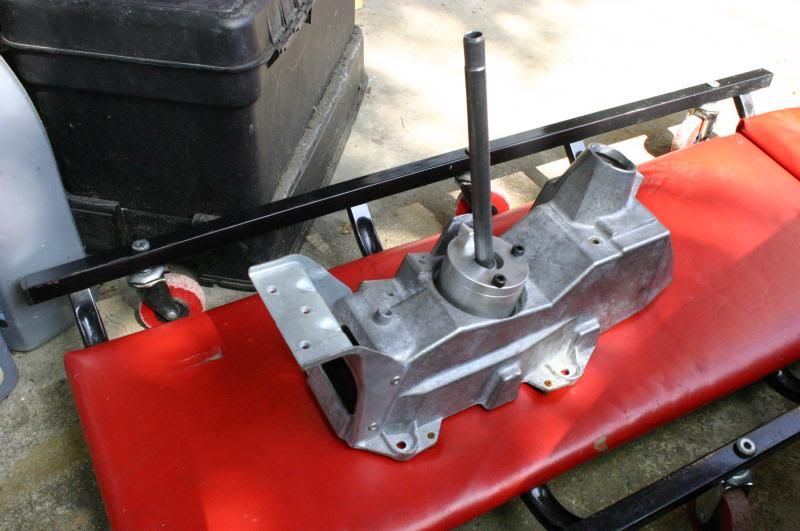
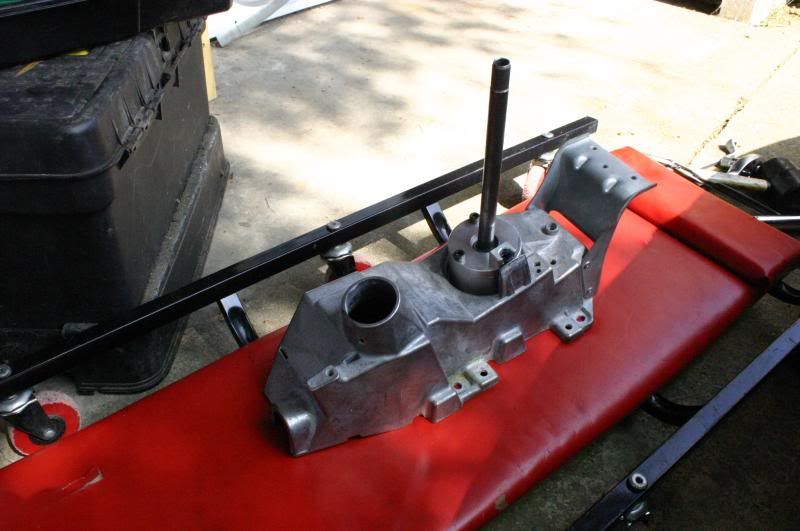
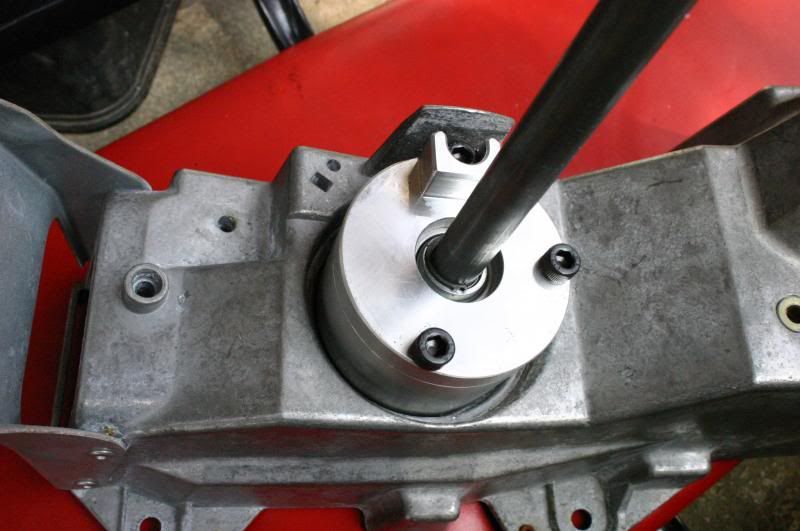
The Jaamsaab quickshift unit, beautifully engineered:
Swap the reverse lock mechanism and ignition barrel from the old unit to the unit, then you're ready to install the new unit:
Place new unit, then refit the 13mm bolt to the selector arm:

Refit the electrics to the ignition barrel, refit the Torx bolts and the 3x 10mm bolts up front - then you should be looking at this:
Now is a good time to adjust the linkages - put the gearshift in 4th, pop a 4mm allen key (they work well in my opinion) into the alignment hole in front of the gearstick, and another into the alignment hole on top of the gearbox, loosen the pinch bolt on the linkage, wiggle everything, retighten the pinch bolt, and remove the allen keys.
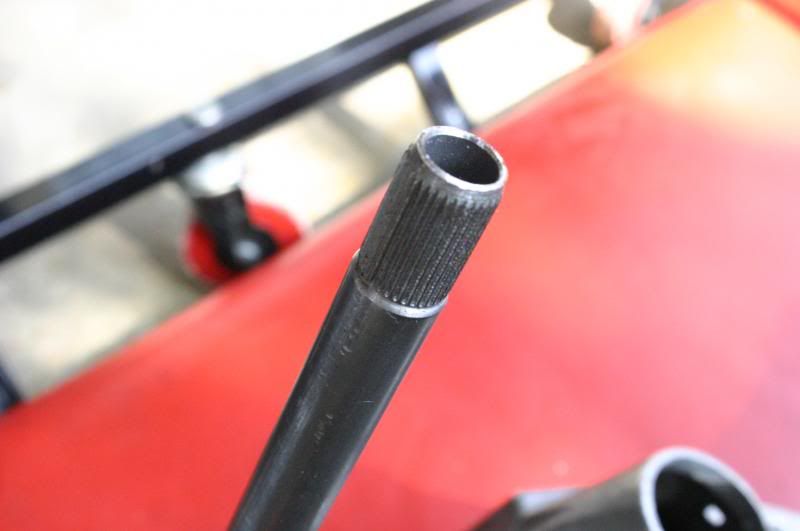
Then the centre console all goes back on, the gearknob (complete with reverse lift) slides off the top of the old gearshift (using a 32mm open spanned & a chamois leather & a clout of a hammer), slide it back on the new gearshift, reattach the gaiter, then job done!
Shift-quality wise, it's as sharp as a Mazda MX5 now. I had heard it described as a rifle-bolt action, and that's most certainly the case.
Many thanks to Martin (Jamsaab) for the excellent service - a very happy customer here
Hope this helps someone with the install!
Full centre console removed as per this thread from Robert.
Lift the leather gaiter up
Remove the compartment or ashtray with holder using a screwdriver and 82 93 474 Removal tool.
Remove the gear lever cover, 2 screws.

Unplug the connector for the central locking system switch.
Lift up the gear lever gaiter and undo the connectors for the seat heating, seat ventilation and cigarette lighter switches.
Important
Mark the connectors to avoid incorrect reconnection - this was easy enough to remember as I only have 2 plugs!
Remove the rear section of the centre console by removing the screw on the top. Then lift straight up and unplug the connector (note the armrest stop & where it sits).

Select reverse and remove the key.
Rotate and lift up the theft protection antenna unit (bayonet fitting) from the ignition switch and unplug the connector.
Insert the key and select neutral.
Disconnect the switch for the electric window lifts and unplug the connectors. Remove the coin holder.
Remove the screws holding the upper part of the centre console, 6 screws.
Lift out the upper part of the centre console, leaving it looking like this:

Fold back the carpets to the side of the centre console; this will involve pulling them out of the lower part of the dash slightly, but they slot back in easily enough afterwards.
Remove the front torx screws, 2 pcs.
Remove the rear screws, 2 pcs.
Lift and remove the centre console, making sure the rear air vent duct comes out too.
Which will leave you looking at this:

Remove the 3 10mm bolts at the front of the selector unit:

Undo the 4 Torx bolts at the base, which will allow you lift the rear of the aluminium casing up slightly. You can then unplug the elecrics from the ignition:

Now the very tricky job of removing the 13mm bolt securing the selector arm to the gearstick. This is tricky as you only get so much movement from the unit until you undo that bolt! I used a cut-down 13mm spanner, but the bolt came out by hand once loosened initially.
When you get the bolt out, the selector unit will just lift out - looking like this (underside):

The Jaamsaab quickshift unit, beautifully engineered:


Swap the reverse lock mechanism and ignition barrel from the old unit to the unit, then you're ready to install the new unit:
Place new unit, then refit the 13mm bolt to the selector arm:

Refit the electrics to the ignition barrel, refit the Torx bolts and the 3x 10mm bolts up front - then you should be looking at this:

Now is a good time to adjust the linkages - put the gearshift in 4th, pop a 4mm allen key (they work well in my opinion) into the alignment hole in front of the gearstick, and another into the alignment hole on top of the gearbox, loosen the pinch bolt on the linkage, wiggle everything, retighten the pinch bolt, and remove the allen keys.
Then the centre console all goes back on, the gearknob (complete with reverse lift) slides off the top of the old gearshift (using a 32mm open spanned & a chamois leather & a clout of a hammer), slide it back on the new gearshift, reattach the gaiter, then job done!
Shift-quality wise, it's as sharp as a Mazda MX5 now. I had heard it described as a rifle-bolt action, and that's most certainly the case.
Many thanks to Martin (Jamsaab) for the excellent service - a very happy customer here
Hope this helps someone with the install!
