Fixing up your rear C900/9000 rear brake calipers...
Posted: Thu Apr 11, 2013 11:12 pm
Having been disappointed with previous rebuilt callipers for my Daihatsu Charade GTti I decided to do my own. The experience gained from those and the excellent workshop manual provided by Daihatsu has let me overhaul the Saab ones even though the manual isn't that comprehensive.
Even so I wouldn't be able to do it with the help of girlysaabfan and the 9000.com site so thanks there, this is just how I personally done it, yet to test them so can't, so far, check to see if my work is indeed any good. I will eventually go onto changing the calliper on the car but I haven't got that far yet
A tip everyone comes out with rebuilding callipers is keeping everything clean when rebuilding, take your time and be methodical, I checked the action of the handbrake mech even before I put the piston back in to make sure all is ok. If in any doubt get a rebuilt one, they're not too expensive in comparison to a rebuild kit.
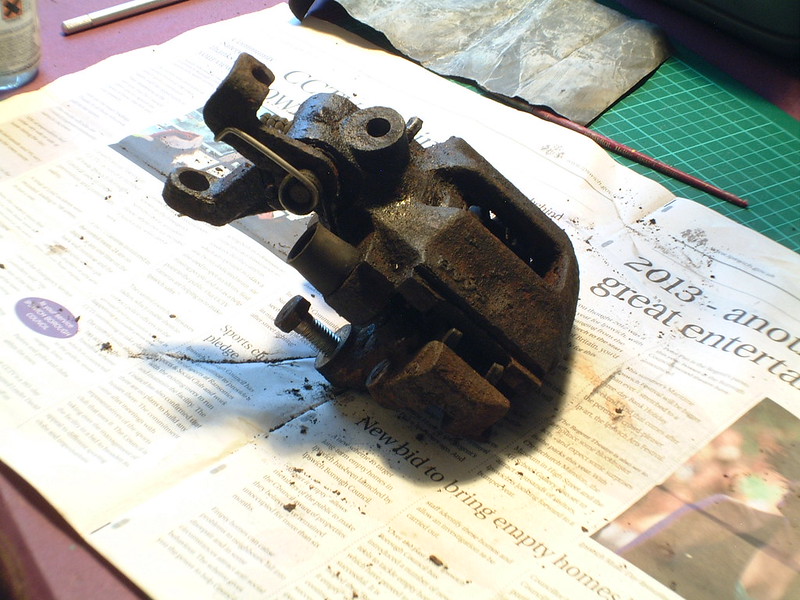
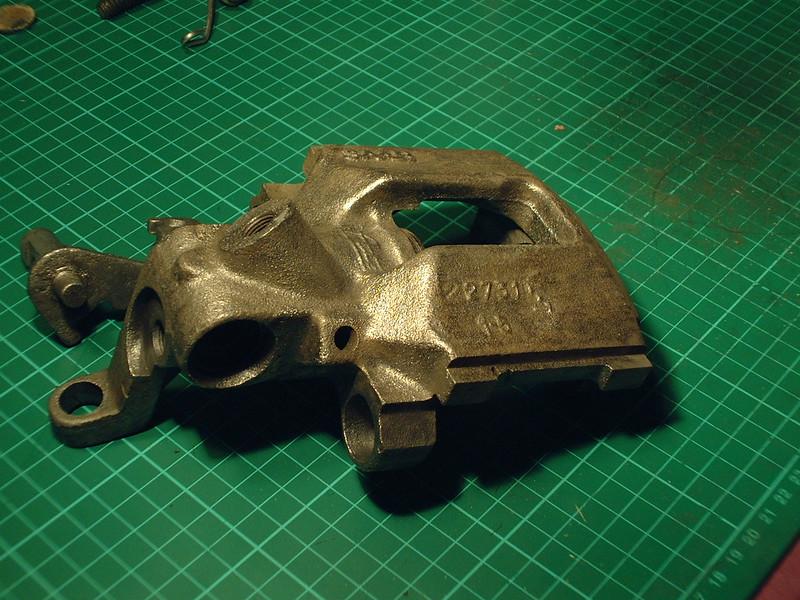
I like to get some spare callipers from a scrappy and then jazz them up at my leisure so here we have one from a scrappy from a white 900s 16saabs got hold of and which I picked up a load of stuff from..
I took the carriers off first and on one the bleed nipple, the other I left in as it wouldn't come out and decided to let some of the DEOX-C rust remover to see if it could do some business on it. Dunno if it helped or not but had to use a major heavy duty set of mole grips I borrowed of my brother to shift it but fortunately it did come off...
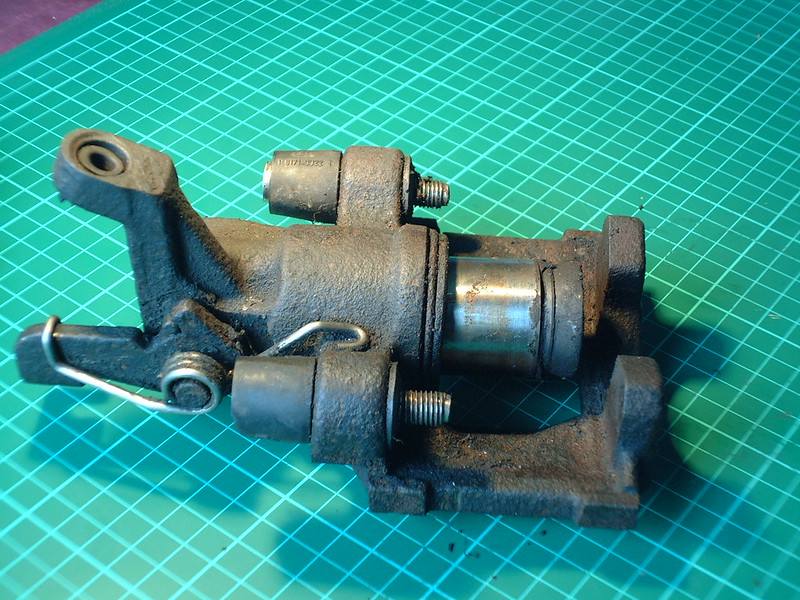
I then took the boot off from around the piston, I used a socket wrench with the 4mm allen key attachment to unscrew the adjusting nut easily and quickly, be very careful though, this is a easy way to mess the head up, it is this part which let me down on the refurbished calliper on the Charade, it was helicoiled badly..
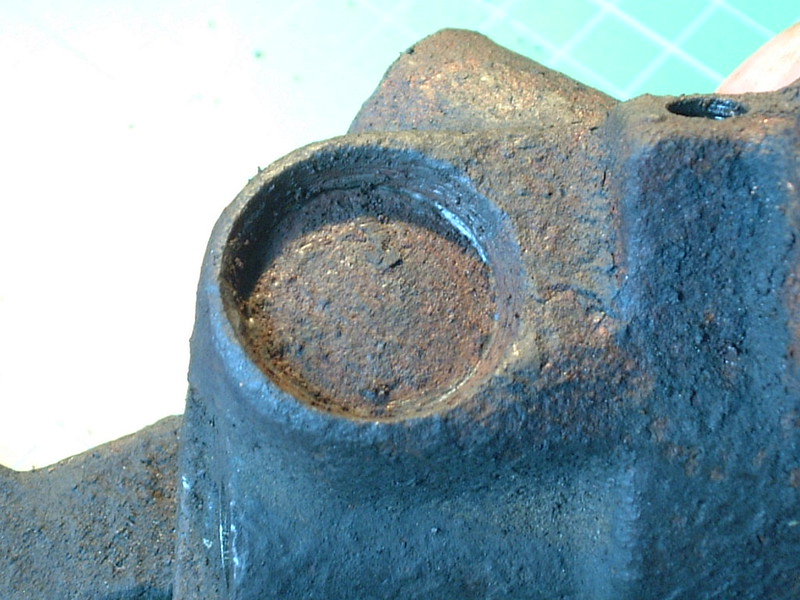
This is the adjusting screw, it is normally covered by a shallow nut which is in effect a plug. By turning the screw both ways you'll soon know which way to turn it by how the piston goes in and out..
Once the piston is out (may need some help in it's last few mm) I then took the rubber ring inside the bore of the calliper then we got down to the tricky bit, taking the circlip out of the bottom of the bore..
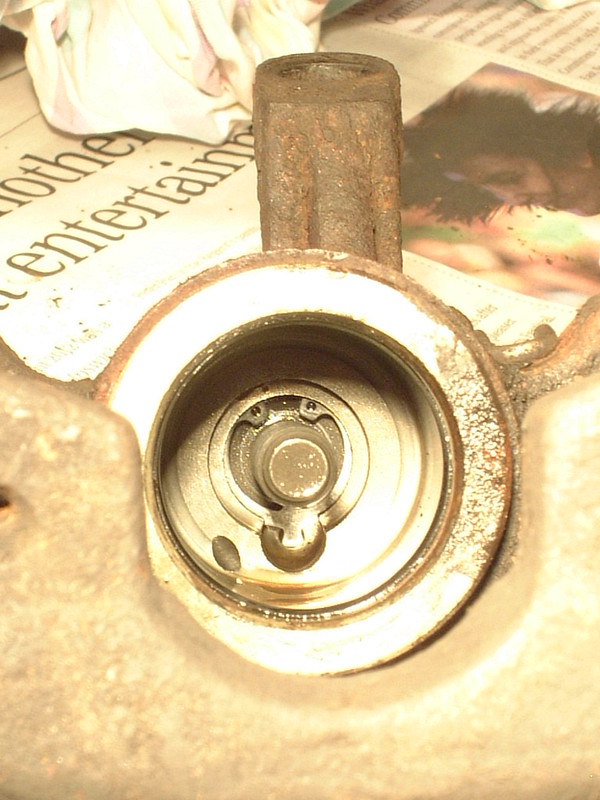
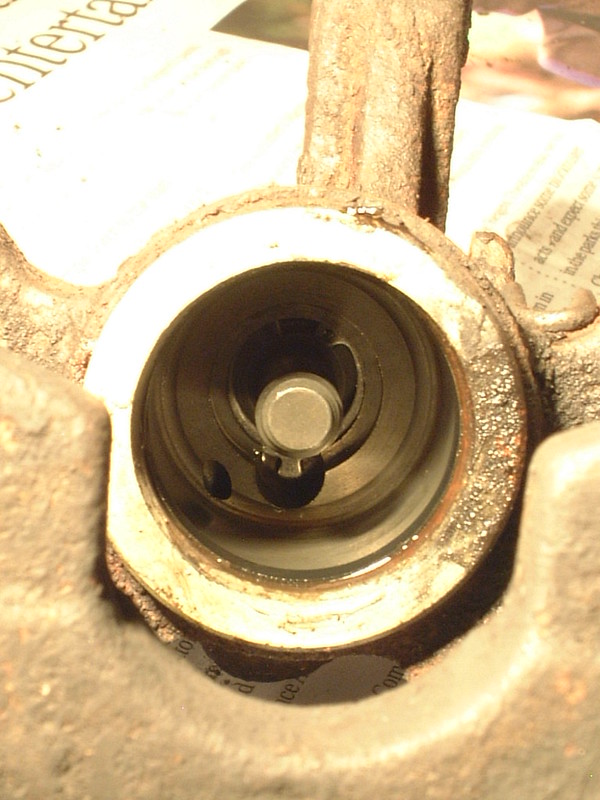
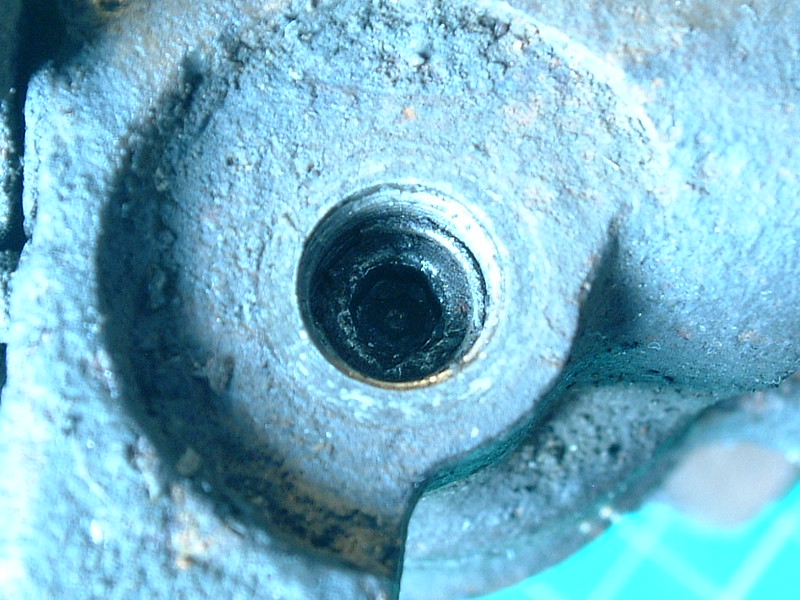
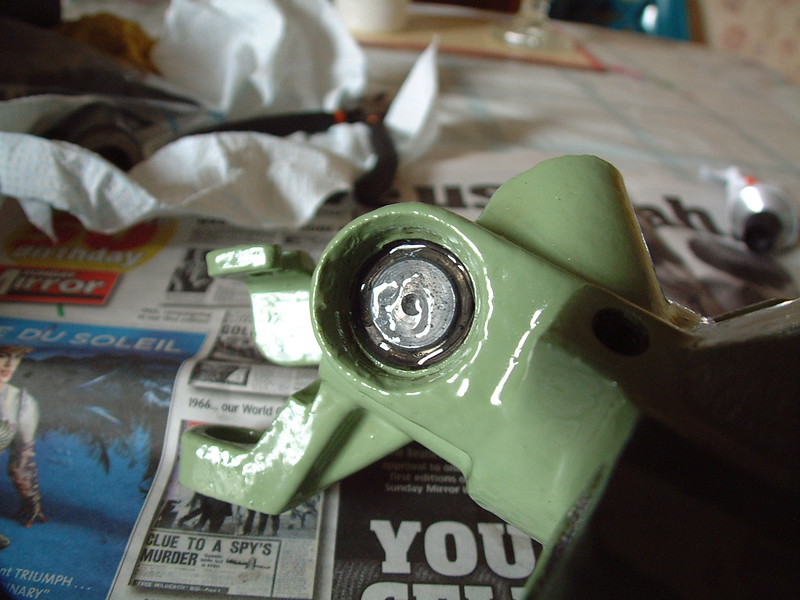
The first pic you can see the holes where your circlip pliers fit in, I had to use long nose ones as there's no way ordinary ones would fit in, I also had to grind them down a bit to make the points fit in the holes, damn pig of a job as little space and can't see what's going on. The second pic shows the other side of the circlip to stop it turning in the bore.
If you're lucky it'll take 30 seconds, if not, 30 minutes, mine was both of these.
With this free and out you can then take the screw out, I had to use pliers carefully used as it was in so hard I couldn't get it out with just finger power alone.
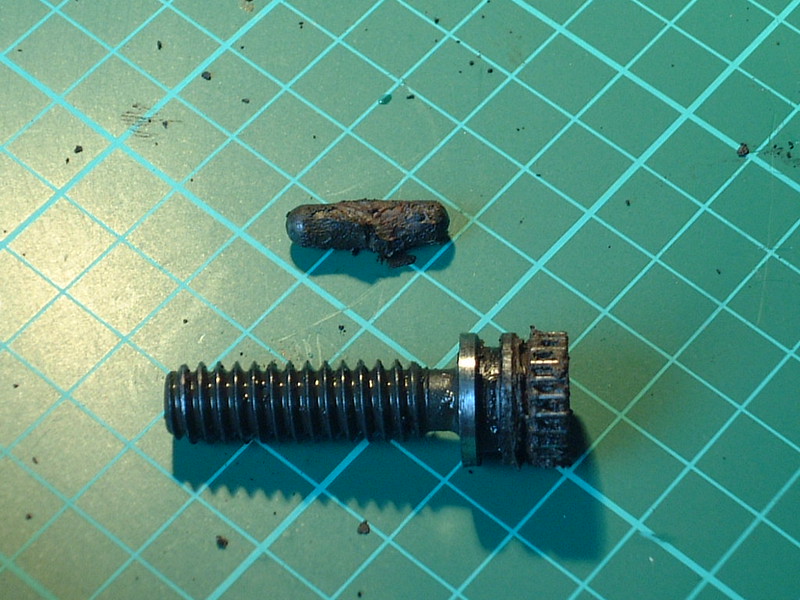
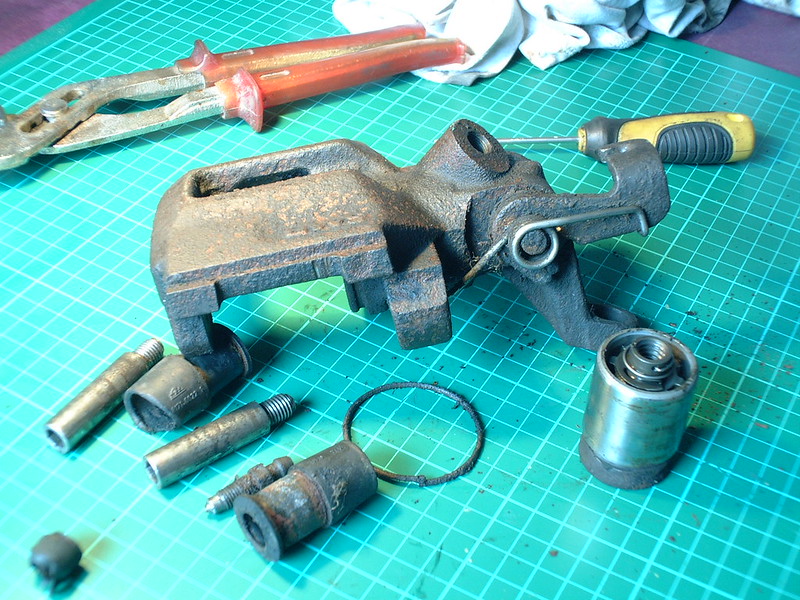
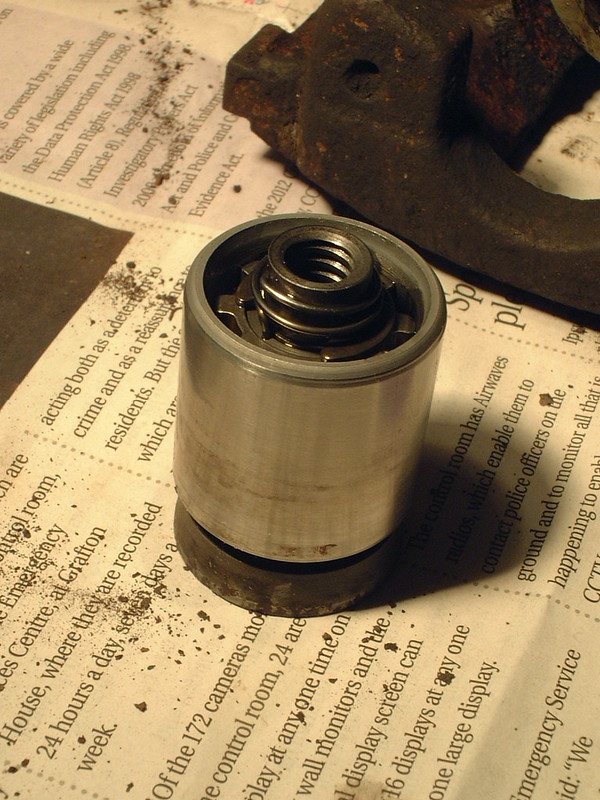
The crap on the gear and the pin above is what by the looks of it is copper grease, I use silicone grease which is what is in the Daihatsu manual. The pin fits into the gear end of the screw, it is this pin which fits into the handbrake pin so when this turns the pin pushes on the screw to push the piston. The gear itself is what fits into the adjusting screw on the back end of the calliper so you can screw the piston in and out. There is also not pictured here a rubber o ring in the groove between the gearing and thread.
With this all out I then soaked it in a solution of DEOX-C for a couple fo days, works wonder sthis stuff as can be seen.
This where it almost goes wrong, this is a bung which is at the bottom of the handbrake actuator arm, on 9000.com it seems an easy task to pull out the arm to get at the inner workings of the arm. With me it was no go, much levering didn't work so in the end I carefully hammered a small screwdriver to lever out the bung. This left what looked like a chunk out of the bung. This wouldn't be any good but fortunately the metal is soft and easily tapped and flattened back into a more sealing shape, I also experimented by using solder to fill it out more too.
With this out I could take the other circlip off and slip the arm out, clean this up and then start painting. In my case British Leyland Green calliper paint, but to be honest it smelt and behaved like ordinary enamel paint but it don't matter, it's still doing fine on my 2 year old Charade callipers.
The o-ring which seals the arm to the calliper I deviated from 9000.com, I put it in with the tapered end up instead of flat end up as on 9000.com, only because in my case this is how I found it on the calliper, which is right eh?!
After at least 3 coats all over of British Leyland green I put the arm back and put the circlip and washer back with plenty of silicone grease. Tapped the bung back in with a same size socket as on 9000.com and all is good.
Using silicone grease I put all the rubber bits back on, including on the adjusting screw, bore and piston...
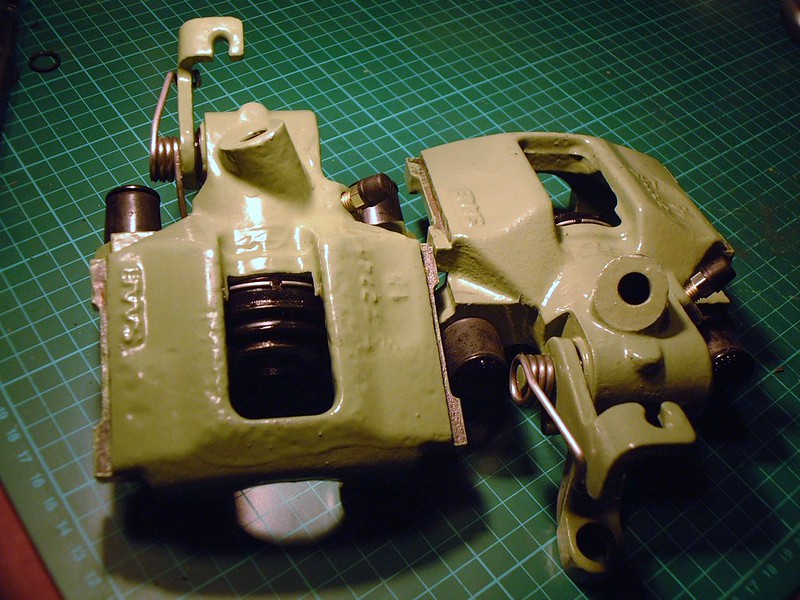
Which is in not too bad shape. Giving an even pressure whilst turning the adjusting screw winds it back in so eventually you end up with something like this:
Bleed screws I got off fleabay, size Metric M7x1 and the rubber caps come with the kit.
Paint from http://www.paintsrus.co.uk/paints/automotive/100ml-brake-caliper-engine-heat-resistant-gloss-paint/prod_85.html
Calliper kit from parts for saabs
This write up was done in a bit of a rush job so any corrections or ideas warmly welcomed
Even so I wouldn't be able to do it with the help of girlysaabfan and the 9000.com site so thanks there, this is just how I personally done it, yet to test them so can't, so far, check to see if my work is indeed any good. I will eventually go onto changing the calliper on the car but I haven't got that far yet
A tip everyone comes out with rebuilding callipers is keeping everything clean when rebuilding, take your time and be methodical, I checked the action of the handbrake mech even before I put the piston back in to make sure all is ok. If in any doubt get a rebuilt one, they're not too expensive in comparison to a rebuild kit.
I like to get some spare callipers from a scrappy and then jazz them up at my leisure so here we have one from a scrappy from a white 900s 16saabs got hold of and which I picked up a load of stuff from..
I took the carriers off first and on one the bleed nipple, the other I left in as it wouldn't come out and decided to let some of the DEOX-C rust remover to see if it could do some business on it. Dunno if it helped or not but had to use a major heavy duty set of mole grips I borrowed of my brother to shift it but fortunately it did come off...
I then took the boot off from around the piston, I used a socket wrench with the 4mm allen key attachment to unscrew the adjusting nut easily and quickly, be very careful though, this is a easy way to mess the head up, it is this part which let me down on the refurbished calliper on the Charade, it was helicoiled badly..
This is the adjusting screw, it is normally covered by a shallow nut which is in effect a plug. By turning the screw both ways you'll soon know which way to turn it by how the piston goes in and out..
Once the piston is out (may need some help in it's last few mm) I then took the rubber ring inside the bore of the calliper then we got down to the tricky bit, taking the circlip out of the bottom of the bore..
The first pic you can see the holes where your circlip pliers fit in, I had to use long nose ones as there's no way ordinary ones would fit in, I also had to grind them down a bit to make the points fit in the holes, damn pig of a job as little space and can't see what's going on. The second pic shows the other side of the circlip to stop it turning in the bore.
If you're lucky it'll take 30 seconds, if not, 30 minutes, mine was both of these.
With this free and out you can then take the screw out, I had to use pliers carefully used as it was in so hard I couldn't get it out with just finger power alone.
The crap on the gear and the pin above is what by the looks of it is copper grease, I use silicone grease which is what is in the Daihatsu manual. The pin fits into the gear end of the screw, it is this pin which fits into the handbrake pin so when this turns the pin pushes on the screw to push the piston. The gear itself is what fits into the adjusting screw on the back end of the calliper so you can screw the piston in and out. There is also not pictured here a rubber o ring in the groove between the gearing and thread.
With this all out I then soaked it in a solution of DEOX-C for a couple fo days, works wonder sthis stuff as can be seen.
This where it almost goes wrong, this is a bung which is at the bottom of the handbrake actuator arm, on 9000.com it seems an easy task to pull out the arm to get at the inner workings of the arm. With me it was no go, much levering didn't work so in the end I carefully hammered a small screwdriver to lever out the bung. This left what looked like a chunk out of the bung. This wouldn't be any good but fortunately the metal is soft and easily tapped and flattened back into a more sealing shape, I also experimented by using solder to fill it out more too.
With this out I could take the other circlip off and slip the arm out, clean this up and then start painting. In my case British Leyland Green calliper paint, but to be honest it smelt and behaved like ordinary enamel paint but it don't matter, it's still doing fine on my 2 year old Charade callipers.
The o-ring which seals the arm to the calliper I deviated from 9000.com, I put it in with the tapered end up instead of flat end up as on 9000.com, only because in my case this is how I found it on the calliper, which is right eh?!
After at least 3 coats all over of British Leyland green I put the arm back and put the circlip and washer back with plenty of silicone grease. Tapped the bung back in with a same size socket as on 9000.com and all is good.
Using silicone grease I put all the rubber bits back on, including on the adjusting screw, bore and piston...
Which is in not too bad shape. Giving an even pressure whilst turning the adjusting screw winds it back in so eventually you end up with something like this:
Bleed screws I got off fleabay, size Metric M7x1 and the rubber caps come with the kit.
Paint from http://www.paintsrus.co.uk/paints/automotive/100ml-brake-caliper-engine-heat-resistant-gloss-paint/prod_85.html
Calliper kit from parts for saabs
This write up was done in a bit of a rush job so any corrections or ideas warmly welcomed


