My Guide to Upgrading the 4 Speaker System in a Saab 9-3 SS
Posted: Thu Jan 10, 2013 6:11 am
Hi everyone, this will be my first post. I found this site shortly after buying my Saab 9-3 Aero and finding that the 4 speaker audio system was dreadful. Having seen Witts180's post about what he'd managed to get done to his car to resolve the problem it gave me the confidence to go out there and do something similar. Whilst I'm no audio enthusiast, I do like to have at least a nice sounding system so music sounds as it is intended... but being on a budget here's what I did.
So, if anyone's interested in hearing how you can massively improve the standard 4 speaker audio system... please read on.
Total spent: Just under £130 inc. delivery.
Goods purchased from: CarAudiosecurity.com
Tools required: T30 Torx bit on screwdriver , L shaped T25 Torx key , Flathead screwdriver, Scissors, Stanley Knife, Posi-Drive screwdriver and some gaffer tape.
Now I'm no professional fitter, I've just a basic knowledge of this sort of thing so for those of you who are a bit more capable and can solder / crimp connections then do this rather than use the gaffer tape that I went with.
Here's the speakers I purchased:
 JL Audio TR350-CXi - 8cm speakers - £34.99 at the time of purchase from caraudiosecurity.com
 KENWOOD-KFC-M6944A - 6x9 speakers - £34.99 at the time of purchase from caraudiosecurity.com
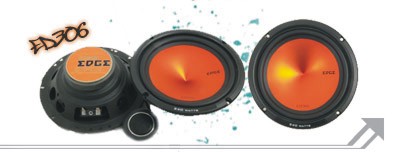 Edge ED306 - 17cm Component speakers - £39.99 at the time of purchase from caraudiosecurity.com
 Dynamat speaker kit deadening - £9.98 at the time of purchase from caraudiosecurity.com
Here's how I fitted everything:
Firstly the 6x9's. To fit these you'll need to open the boot and unlock your back seats by pulling the handles. Now pull down your back seats and unclip the parcel shelf cover (give it a good tug and it'll pop off - don't loose the little black pop in rivet things). I recommend at this point you put your seats back up as it'll make the rest of the job much easier.
You'll now see your crappy pair of 4" standard Saab speakers. Remove these using the relevant tool (I think it was the T25 Torx key).
Remove the wiring from both speakers.... don't throw out the speakers though since you can stick these on eBay and make a few quid to help offset the cost of the speaker upgrade.
What I then did was screw in both 6x9 speakers (don't use the grills provided as there's no room for them when the parcel shelf cover goes back on). I wired them up to see how if it sound OK. Whilst it was an improvement, it wasn't great. So I unscrewed both speakers and did the following....
I now cut several thin 2cm strips off of the dynamat sheets I'd purchased (2 strips from each sheet should just about suffice). I then cut these strips into smaller pieces and stuck these pieces around the top of the hole where the 6x9 speakers would sit. This obviously bridges the gap between the speaker and the metal frame of the parcel shelf. I know this isn't the absolute best solution, but when dynamat costs as much as it does and I'm working on a budget it'll have to do. Anyhow... I managed to thread the speaker cable through the little holes on the connectors on the speakers and twisted this around to make it secure. Then I put some gaffer tape around these connections to prevent it coming off.
Next I screwed the 6x9 speakers back in place... then opened the boot again to unlock the back seats so I couldput the parcel shelf cover back on. Once lined up use the black rivet things to secure it in place, then push your seats back up to the usual position. You may want to neated up the material at the left and right of the shelf cover as they may be sticking out and should be tucked in.
That's the 6x9's fitted. Even with the thin strip of dynamat around where the speaker sits I could notice a difference, as though it was cushioned and the sound was much cleaner.
Next up...... the 17cm door speakers.
This was a pain in the ''Censored'' because I expected to find some speaker wire tucked away in my doors that I could simply connect JUST my 17cm speakers to and I'd quickly be up and running. My car, for some reason lacked these wires so I had to improvise.
The 17" Edge speakers came with two ''Censored'' little tweeters which have no place to fit in my doors so these got discarded.
I'll explain how I got my door cards off first of all.
Use the flat head screwdriver to pop off the black bit surrounding the part of the door where you pull on to close it. This will reveal two holes. You'll need to use the Torx T30 Screwdriver at this point to remove 2 x Torx bolts. Don't lose these. Now feel around the door card close to the wing mirror... in my car this part of the door card had the slightest bit of play which allowed me to get a grip on it and unclip it. Now just pull around the door card to unclip it from the frame, lastly lift it up and it'll come away completely.
What I did hear was remove the flap that's pre-perforated where the speaker is going to go through the door frame. I also used the stanley knife and cut out the foamy stuff which sits behind the door speaker grill (I actually fitted the speakers with this on and it sounded ''Censored'' so I cut it out and it improved the sound loads). I think it's there to deaden the sound from the outside of the car but when a speaker is sat there you need that sound to get through the grill!
Next I screwed the speaker onto the door car, with the speaker wire connectors facing upwards (this should line up nicely with the holes on the door car for the screws to secure the speaker in place). I will say now that the screws provided with the Edge speakers weren't quite a perfect fit and I found I had to thread them in to get them to grip but once all four screws are in the speaker is solid against the door card.
Now this next bit is where I thought I'd be clever. The Edge speakers came with those crappy little tweeters which when I wired them in sounded awful anyway. Also, when I wired in the 3.5" speakers into the dash those sounded bad at higher volumes since there was too much bass being sent to them..... so save yourself the hassle here and do what I did in order to get the best sound.
Take the crossover box that came with the 17cm speakers. Cut the long 'Speaker IN' cable around 5" from the crossover box. This will leave you with a nice bit of long cable. Now cut the cable labelled WF at around the half way point from the crossover box. Connect the + and - ends to the 17cm speaker. Now take the long bit of wire you've just snipped from the SPEAKER IN part and twist it onto the wires you just connected to the +/- on the 17cm speaker. I taped this up to make it a more secure connection.
This is now the ideal time to cut some suitably sized squares of dynamat and stick them to your door panel where the ''Censored'' end of the speaker will be facing to help reduce any nasty vibrations.... but make sure you leave a couple strips of dynamat as you'll need some for later.
Now I popped my door panel back in place and screwed the torx bolts back into the handle and place the black cover over it... and left the wire from the 17cm speaker to stick out from the side of the door car (almost in line with the metal arm which allows the door to open and close). Now I wrapped this wire around the rubber bit that contains the wiring for all the door functions (again, not an ideal solution but I could find no other!).
Next, I popped off the plastic cover around the bottom of the door and where the bonnet catch is located. I also pulled on the rubber seal where the door is and used the stanley knife to make a slice in this seal (hard to explain by text but the way I did this allowed me to thread this speaker wire through the rubber seal without it ever having to go around it where it may get snagged. I then tucked this around all the plastic and brought the wire right up to where my 3.5" dash speakers are.
Next you need to get them dash speakers out. I used the flat head screwdriver to pop off the grille and the T25 Torx key to unscrew the 2 bolts which hold the speaker in place there. I then did the same with the dynamat around where the new 3.5" speakers would sit as I did with the 6x9 speakers at the back, making a circle of dynamat for the speaker to be cushioned on (again, I tried the 3.5" speaker with and without this and it sound much better with the dynamat there).
Now connect the black Crossover box's SPEAKER IN wires to the wires that used to connect to your old 3.5" speakers. Next, connect the wire from the 17cm speaker which will have been tucked away around all the edges to the cable labelled WF on the crossover box, you'll need to twist these together and secure them with tape or whatever you may have that'll do the job but make sure you get the +/- correct by looking at the cable colour (black+white and just black).
Finally, do the same with the wire labelled TW and connect this to the 3.5" speaker. Now place the crossover box inside the hole where the 3.5" speaker normally sits and push this down enough so it won't obstruct the speaker when you fit that in afterwards. Now test your stereo to make sure sound is coming from all of the speakers. If not, check connections but it all should be OK if you followed them to the word.
Place the 3.5" speaker back into its hole and seat it securely over the dynamat you've just placed in 10 minutes beforehand. Secure the speaker with the 2 T25 Torx bolts and place the grill over the speaker (you may need to push it with a little effort to make it clip in place since the 3.5" speakers are a little taller than your standard ones).
Pop back on any trim you've removed during the process and at this point you should have a fully working 6 speaker setup running.
The results for myself have been pretty good. Obviously what's holding me back is the headunit with it's paltry 150W output... but, if you adjust the bass to almost full, the treble around the same as the bass and keep the Fade at centre you should get very nice clear sound even at high volume without any farting of the speakers.
Obviously, I experimented with a variety of ways of connecting up the speakers to find out what sounded best... which involved wiring both the 3.5" and 17cm speakers to the same speaker wire, totally bypassing the crossover... but what I found with this configuration was that the rear speakers were being fed much less wattage. Also, the 3.5" speakers were receiving more bass than they could handle and the 17cm speakers were receiving treble which sounded awful and at high volume causes the head unit to momentarily cut out the sound every other second until you lower the volume. With the crossover box fitted it sends a bassier signal to the 17cm speaker and a treble signal to the 3.5cm, which sounds much much better. This prevents the farting noises at higher volumes and the 6x9's at the back have a noticeably higher amount of power being sent to them.
Those who have sat in my car before and after this upgrade have all said it's a tremendous improvement over the standard setup.
Better still, everything still looks standard since none of the speakers are visible.
The total time spent fitting these speakers, if done in the order I described is around 3 to 4 hours. I managed just fine without any help from any specialist so if you feel fairly confident I recommend you give it a try yourself to maximise the savings.
And, assuming you can sell on the original 3.5" and 4" speakers on eBay (should fetch at least £30) it at least goes some way towards paying for your upgrades.
I was going to go for a new headunit but having heard how well this sounds I am not going to bother. I did want to have the ability to connect my iPhone or an SD card to the unit so I could easily play my music collection but it's a costly job going for a double din headunit, especially after the wiring adapters / fascias / fitting costs are included. Instead I've bought an iPhone compatible FM Transmitter from Amazon for £14 (received lots of good reviews - KitSound iPod / iPhone / iPad FM Transmitter) . At least now I can still listen to my music collection through my standard head unit.
Hopefully this guide has come in useful for anyone else who is considering upgrading their 4 speaker setup and want's to keep the costs to a minimum.
And please don't be making responses saying 'Why not get a sub and amp' etc.... the whole point of this post was to help those who don't want to spend a fortune and wanted to keep things as standard looking as possible with the best improvement in sound as the main aim.
If anyone can come up with any suggestions to improve on the wiring where the door hinges are I'd be happy to hear them. Obviously my method was not ideal but it does the trick and you don't notice the wire unless you really look for it.
Happy Saabing.
So, if anyone's interested in hearing how you can massively improve the standard 4 speaker audio system... please read on.
Total spent: Just under £130 inc. delivery.
Goods purchased from: CarAudiosecurity.com
Tools required: T30 Torx bit on screwdriver , L shaped T25 Torx key , Flathead screwdriver, Scissors, Stanley Knife, Posi-Drive screwdriver and some gaffer tape.
Now I'm no professional fitter, I've just a basic knowledge of this sort of thing so for those of you who are a bit more capable and can solder / crimp connections then do this rather than use the gaffer tape that I went with.
Here's the speakers I purchased:
JL Audio TR350-CXi - 8cm speakers - £34.99 at the time of purchase from caraudiosecurity.com KENWOOD-KFC-M6944A - 6x9 speakers - £34.99 at the time of purchase from caraudiosecurity.com Edge ED306 - 17cm Component speakers - £39.99 at the time of purchase from caraudiosecurity.com Dynamat speaker kit deadening - £9.98 at the time of purchase from caraudiosecurity.comHere's how I fitted everything:
Firstly the 6x9's. To fit these you'll need to open the boot and unlock your back seats by pulling the handles. Now pull down your back seats and unclip the parcel shelf cover (give it a good tug and it'll pop off - don't loose the little black pop in rivet things). I recommend at this point you put your seats back up as it'll make the rest of the job much easier.
You'll now see your crappy pair of 4" standard Saab speakers. Remove these using the relevant tool (I think it was the T25 Torx key).
Remove the wiring from both speakers.... don't throw out the speakers though since you can stick these on eBay and make a few quid to help offset the cost of the speaker upgrade.
What I then did was screw in both 6x9 speakers (don't use the grills provided as there's no room for them when the parcel shelf cover goes back on). I wired them up to see how if it sound OK. Whilst it was an improvement, it wasn't great. So I unscrewed both speakers and did the following....
I now cut several thin 2cm strips off of the dynamat sheets I'd purchased (2 strips from each sheet should just about suffice). I then cut these strips into smaller pieces and stuck these pieces around the top of the hole where the 6x9 speakers would sit. This obviously bridges the gap between the speaker and the metal frame of the parcel shelf. I know this isn't the absolute best solution, but when dynamat costs as much as it does and I'm working on a budget it'll have to do. Anyhow... I managed to thread the speaker cable through the little holes on the connectors on the speakers and twisted this around to make it secure. Then I put some gaffer tape around these connections to prevent it coming off.
Next I screwed the 6x9 speakers back in place... then opened the boot again to unlock the back seats so I couldput the parcel shelf cover back on. Once lined up use the black rivet things to secure it in place, then push your seats back up to the usual position. You may want to neated up the material at the left and right of the shelf cover as they may be sticking out and should be tucked in.
That's the 6x9's fitted. Even with the thin strip of dynamat around where the speaker sits I could notice a difference, as though it was cushioned and the sound was much cleaner.
Next up...... the 17cm door speakers.
This was a pain in the ''Censored'' because I expected to find some speaker wire tucked away in my doors that I could simply connect JUST my 17cm speakers to and I'd quickly be up and running. My car, for some reason lacked these wires so I had to improvise.
The 17" Edge speakers came with two ''Censored'' little tweeters which have no place to fit in my doors so these got discarded.
I'll explain how I got my door cards off first of all.
Use the flat head screwdriver to pop off the black bit surrounding the part of the door where you pull on to close it. This will reveal two holes. You'll need to use the Torx T30 Screwdriver at this point to remove 2 x Torx bolts. Don't lose these. Now feel around the door card close to the wing mirror... in my car this part of the door card had the slightest bit of play which allowed me to get a grip on it and unclip it. Now just pull around the door card to unclip it from the frame, lastly lift it up and it'll come away completely.
What I did hear was remove the flap that's pre-perforated where the speaker is going to go through the door frame. I also used the stanley knife and cut out the foamy stuff which sits behind the door speaker grill (I actually fitted the speakers with this on and it sounded ''Censored'' so I cut it out and it improved the sound loads). I think it's there to deaden the sound from the outside of the car but when a speaker is sat there you need that sound to get through the grill!
Next I screwed the speaker onto the door car, with the speaker wire connectors facing upwards (this should line up nicely with the holes on the door car for the screws to secure the speaker in place). I will say now that the screws provided with the Edge speakers weren't quite a perfect fit and I found I had to thread them in to get them to grip but once all four screws are in the speaker is solid against the door card.
Now this next bit is where I thought I'd be clever. The Edge speakers came with those crappy little tweeters which when I wired them in sounded awful anyway. Also, when I wired in the 3.5" speakers into the dash those sounded bad at higher volumes since there was too much bass being sent to them..... so save yourself the hassle here and do what I did in order to get the best sound.
Take the crossover box that came with the 17cm speakers. Cut the long 'Speaker IN' cable around 5" from the crossover box. This will leave you with a nice bit of long cable. Now cut the cable labelled WF at around the half way point from the crossover box. Connect the + and - ends to the 17cm speaker. Now take the long bit of wire you've just snipped from the SPEAKER IN part and twist it onto the wires you just connected to the +/- on the 17cm speaker. I taped this up to make it a more secure connection.
This is now the ideal time to cut some suitably sized squares of dynamat and stick them to your door panel where the ''Censored'' end of the speaker will be facing to help reduce any nasty vibrations.... but make sure you leave a couple strips of dynamat as you'll need some for later.
Now I popped my door panel back in place and screwed the torx bolts back into the handle and place the black cover over it... and left the wire from the 17cm speaker to stick out from the side of the door car (almost in line with the metal arm which allows the door to open and close). Now I wrapped this wire around the rubber bit that contains the wiring for all the door functions (again, not an ideal solution but I could find no other!).
Next, I popped off the plastic cover around the bottom of the door and where the bonnet catch is located. I also pulled on the rubber seal where the door is and used the stanley knife to make a slice in this seal (hard to explain by text but the way I did this allowed me to thread this speaker wire through the rubber seal without it ever having to go around it where it may get snagged. I then tucked this around all the plastic and brought the wire right up to where my 3.5" dash speakers are.
Next you need to get them dash speakers out. I used the flat head screwdriver to pop off the grille and the T25 Torx key to unscrew the 2 bolts which hold the speaker in place there. I then did the same with the dynamat around where the new 3.5" speakers would sit as I did with the 6x9 speakers at the back, making a circle of dynamat for the speaker to be cushioned on (again, I tried the 3.5" speaker with and without this and it sound much better with the dynamat there).
Now connect the black Crossover box's SPEAKER IN wires to the wires that used to connect to your old 3.5" speakers. Next, connect the wire from the 17cm speaker which will have been tucked away around all the edges to the cable labelled WF on the crossover box, you'll need to twist these together and secure them with tape or whatever you may have that'll do the job but make sure you get the +/- correct by looking at the cable colour (black+white and just black).
Finally, do the same with the wire labelled TW and connect this to the 3.5" speaker. Now place the crossover box inside the hole where the 3.5" speaker normally sits and push this down enough so it won't obstruct the speaker when you fit that in afterwards. Now test your stereo to make sure sound is coming from all of the speakers. If not, check connections but it all should be OK if you followed them to the word.
Place the 3.5" speaker back into its hole and seat it securely over the dynamat you've just placed in 10 minutes beforehand. Secure the speaker with the 2 T25 Torx bolts and place the grill over the speaker (you may need to push it with a little effort to make it clip in place since the 3.5" speakers are a little taller than your standard ones).
Pop back on any trim you've removed during the process and at this point you should have a fully working 6 speaker setup running.
The results for myself have been pretty good. Obviously what's holding me back is the headunit with it's paltry 150W output... but, if you adjust the bass to almost full, the treble around the same as the bass and keep the Fade at centre you should get very nice clear sound even at high volume without any farting of the speakers.
Obviously, I experimented with a variety of ways of connecting up the speakers to find out what sounded best... which involved wiring both the 3.5" and 17cm speakers to the same speaker wire, totally bypassing the crossover... but what I found with this configuration was that the rear speakers were being fed much less wattage. Also, the 3.5" speakers were receiving more bass than they could handle and the 17cm speakers were receiving treble which sounded awful and at high volume causes the head unit to momentarily cut out the sound every other second until you lower the volume. With the crossover box fitted it sends a bassier signal to the 17cm speaker and a treble signal to the 3.5cm, which sounds much much better. This prevents the farting noises at higher volumes and the 6x9's at the back have a noticeably higher amount of power being sent to them.
Those who have sat in my car before and after this upgrade have all said it's a tremendous improvement over the standard setup.
Better still, everything still looks standard since none of the speakers are visible.
The total time spent fitting these speakers, if done in the order I described is around 3 to 4 hours. I managed just fine without any help from any specialist so if you feel fairly confident I recommend you give it a try yourself to maximise the savings.
And, assuming you can sell on the original 3.5" and 4" speakers on eBay (should fetch at least £30) it at least goes some way towards paying for your upgrades.
I was going to go for a new headunit but having heard how well this sounds I am not going to bother. I did want to have the ability to connect my iPhone or an SD card to the unit so I could easily play my music collection but it's a costly job going for a double din headunit, especially after the wiring adapters / fascias / fitting costs are included. Instead I've bought an iPhone compatible FM Transmitter from Amazon for £14 (received lots of good reviews - KitSound iPod / iPhone / iPad FM Transmitter) . At least now I can still listen to my music collection through my standard head unit.
Hopefully this guide has come in useful for anyone else who is considering upgrading their 4 speaker setup and want's to keep the costs to a minimum.
And please don't be making responses saying 'Why not get a sub and amp' etc.... the whole point of this post was to help those who don't want to spend a fortune and wanted to keep things as standard looking as possible with the best improvement in sound as the main aim.
If anyone can come up with any suggestions to improve on the wiring where the door hinges are I'd be happy to hear them. Obviously my method was not ideal but it does the trick and you don't notice the wire unless you really look for it.
Happy Saabing.